The NES Controller Refurbishment Field Guide

Are you tired of pressing down on your controller buttons only to be met with silence? Are your in-game characters taking on a life of their own and ignoring your commands? It might be time to give your trusty controller a little TLC by replacing those old, crusty rubber membranes inside.
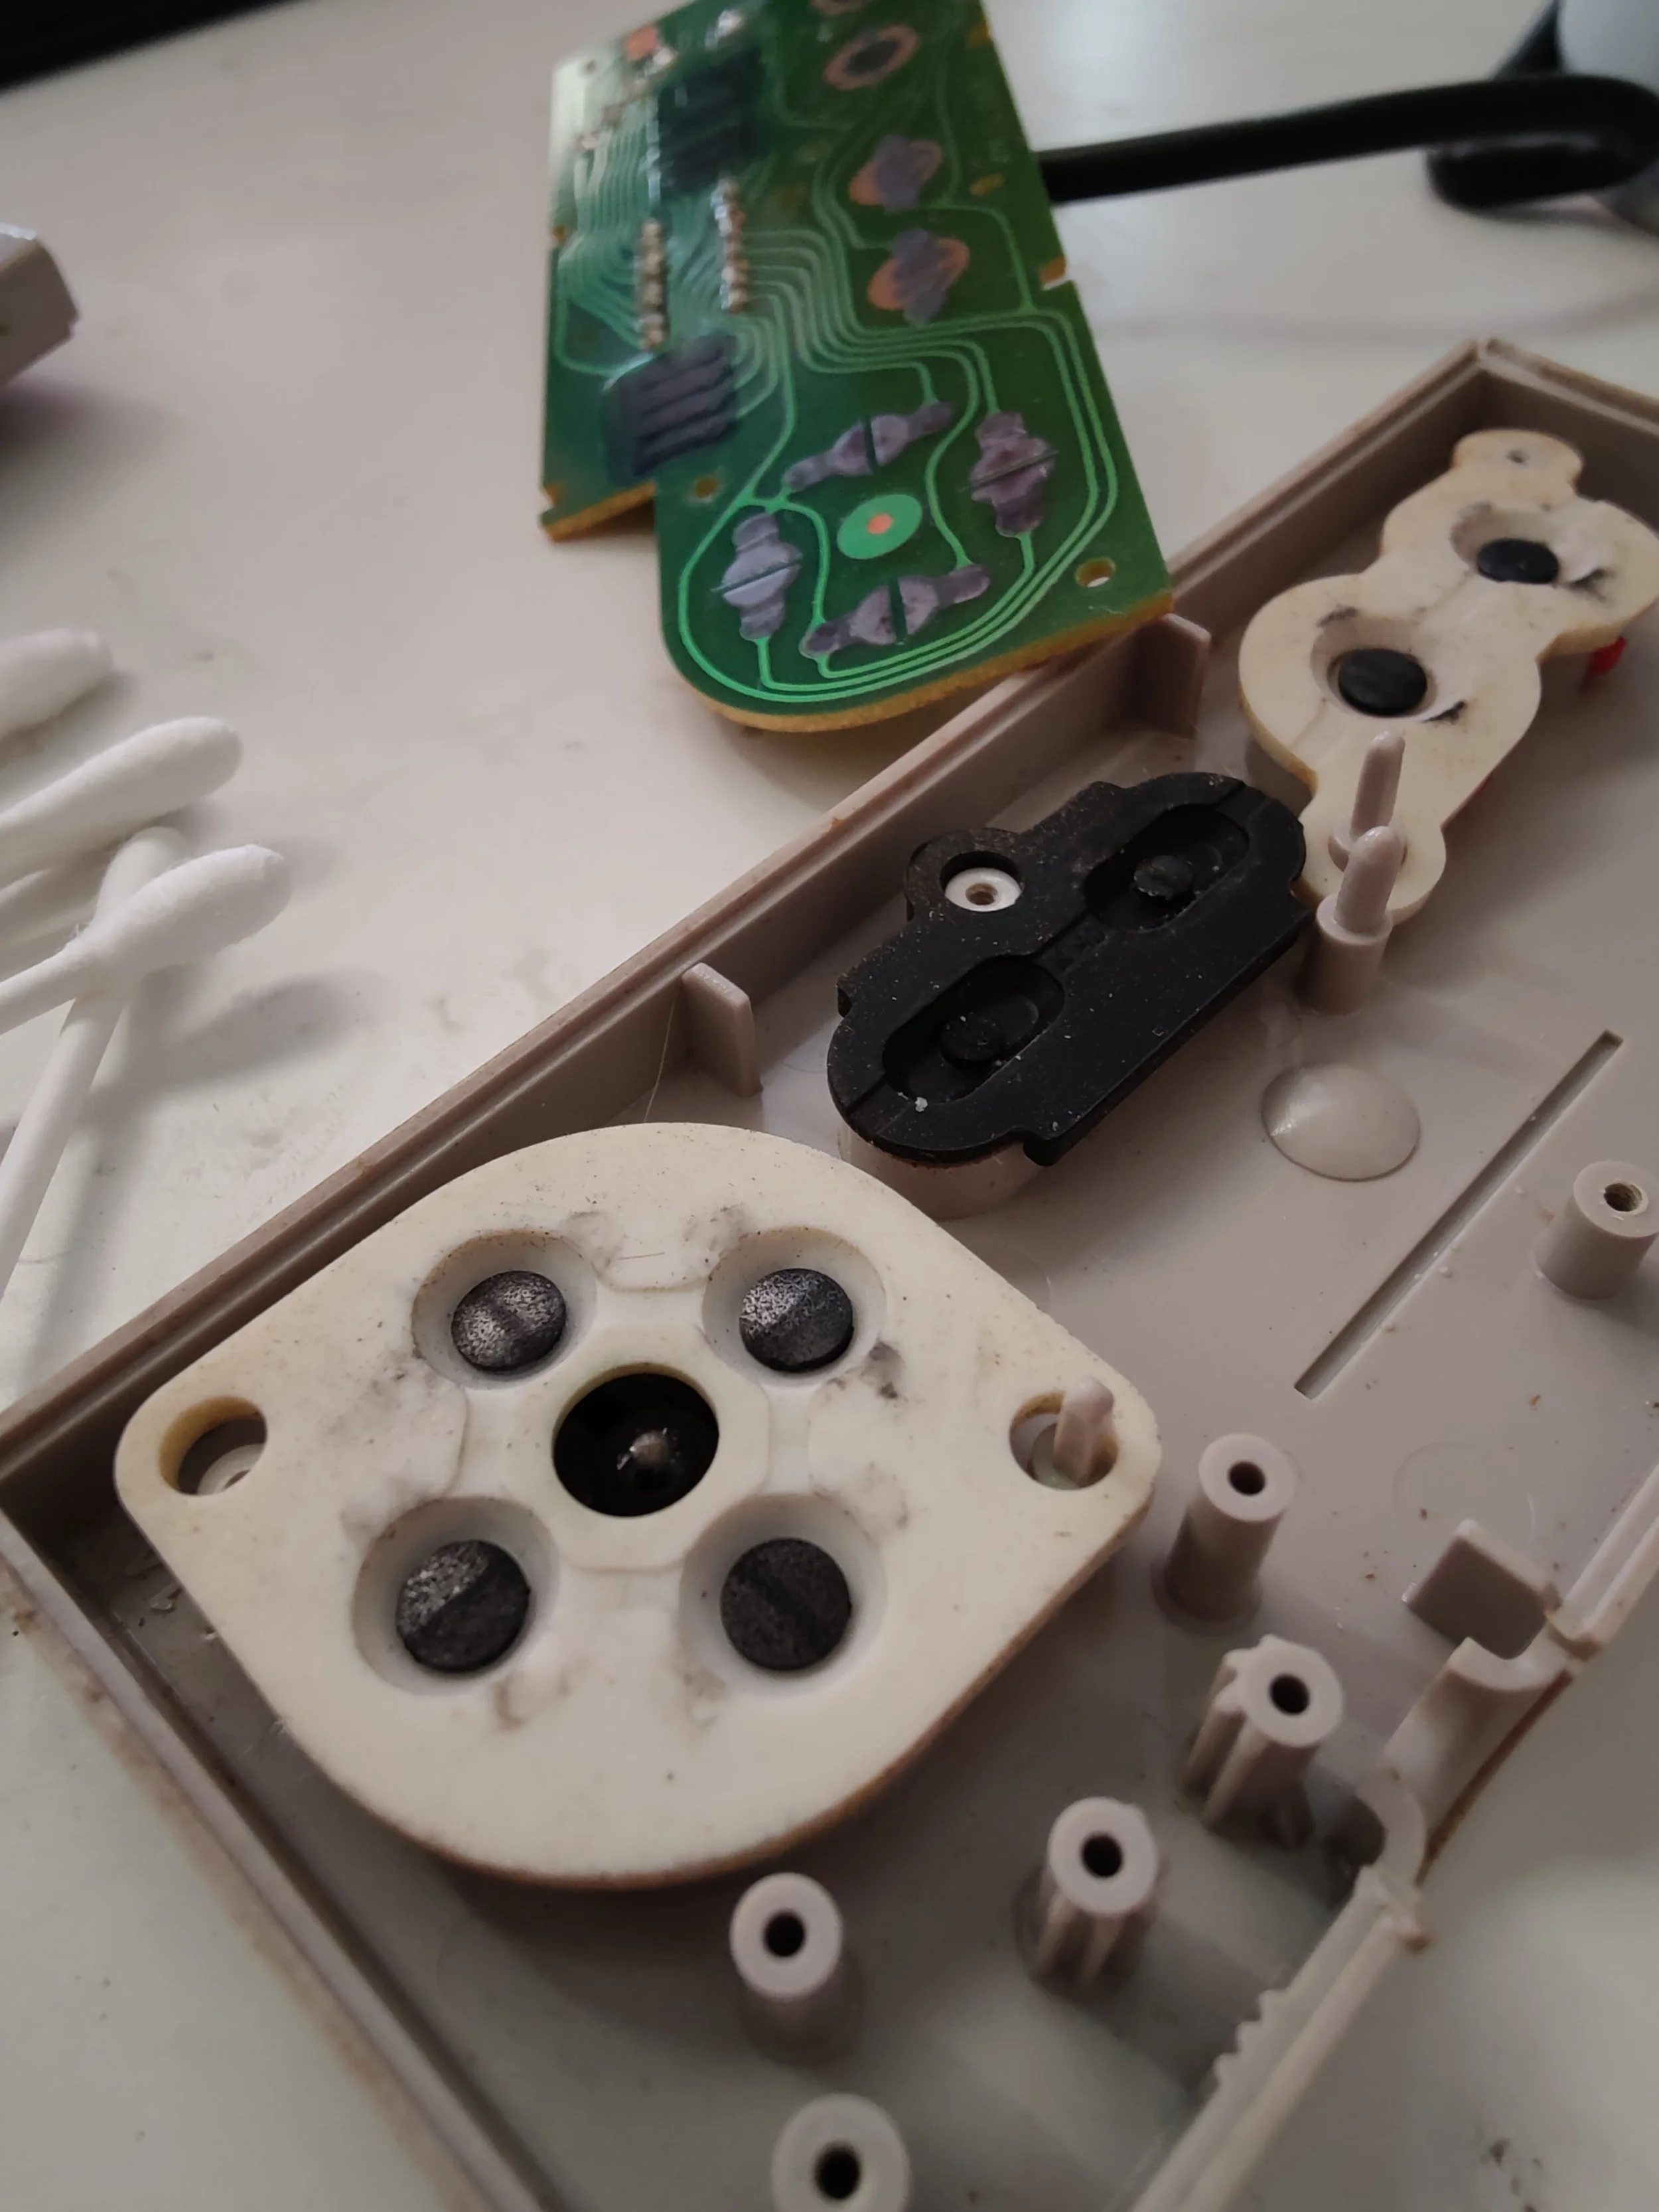
But wait, you might be wondering, what exactly are these rubber membranes and what do they do? Well, let me break it down for you. These little guys act as a barrier between the buttons and the internal circuitry of the controller. When you press down on a button, the pressure causes the rubber membrane to make contact with a carbon pad, which is connected to a contact trace on the circuit board. This contact trace carries an electrical current, which is registered by the controller as a button press.
In other words, the rubber membranes are like the go-between for your fingers and the controller's brains. Without them, the buttons wouldn't be able to communicate with the internal circuitry and your controller would be as useful as a brick. So if you're experiencing issues with unresponsive buttons or inconsistent input, it might be time to consider replacing those rubber membranes. Trust me, your thumbs (and your in-game character) will thank you.
Here are a few symptoms to look out for:
Unresponsive buttons: If you're pressing down on a button and nothing is happening in the game, it may be a sign that the rubber membrane is stiff or damaged.
Inconsistent button presses: If your in-game character seems to have a mind of their own, moving in unexpected directions or performing actions when you're not pressing any buttons, it could be a sign that the rubber membrane is damaged or misaligned.
Sticky or gummy buttons: If your buttons feel sticky or gummy when you press them, it could be a sign that the rubber membrane is deteriorating and needs to be replaced.
Also, time is not your friend. The rubber membranes inside the controller are made of a type of silicone, which can become stiff and unresponsive over time due to a process called "vulcanization." Vulcanization is a chemical reaction that occurs when silicone is exposed to heat, light, and oxygen, causing it to break down and become harder and less flexible. In addition to the rubber membranes, the carbon pads on the buttons can also wear out over time, leading to unresponsive or incorrectly registering buttons.
First things first, let's gather our materials. You'll need a new set of rubber membranes (which you can easily find online or at a retro gaming store), a small flathead screwdriver, and a pair of tweezers. Oh, and don't forget the isopropyl alcohol and cotton swabs for a thorough cleaning before reassembling your controller.

Now, let's get down to business. Flip your controller over and locate those six pesky screws on the back. Carefully remove them with your screwdriver, being mindful not to strip the heads (we don't want to make this any harder than it already is). Next, gently insert the flathead screwdriver between the two halves of the controller and wiggle it back and forth to loosen the halves.

Once the controller is open, you'll see the old rubber membranes staring back at you. Using your tweezers, carefully remove each one and set them aside.

It's time to bring in the fresh troops! Take your first new rubber membrane and align it with the corresponding button on the controller. Gently press it into place, making sure it sits flush with the button. Repeat this process for all the buttons.

Before we put the controller back together, let's give it a good cleaning. Dampen a cotton swab with isopropyl alcohol and use it to gently clean the buttons and rubber membranes, as well as the inside and outside of the controller. You can also use compressed air to blow out any dirt or debris that may have accumulated inside. Just be sure not to use water or other solvents as they can damage the plastic.
Now it's time to put the controller back together. Carefully align the two halves and press them together firmly. Finally, replace the screws and give your controller a test run. You should notice a significant improvement in responsiveness and accuracy. Just be sure to tighten the screws just enough to hold the two halves together securely, we don't want to strip those heads!
By following these simple steps and regularly cleaning and maintaining your controller, you can keep it in top shape for many gaming sessions to come. So go on, give your old 8-bit Nintendo NES controller a new lease on life and get back to saving the princess (or whatever it is you're into).
As you're replacing the rubber membranes in your 8-bit Nintendo NES controller, it's important to be careful not to rub the carbon off of the pads with either solvents or with your fingers. The carbon on the pads is responsible for conducting electricity and allowing the buttons to register when they are pressed. If the carbon is rubbed off, the buttons may become unresponsive or may register presses even when they are not being pressed.
To avoid rubbing the carbon off of the pads, handle the membranes carefully and avoid pressing too hard on the pads. When installing the new membranes, be sure to align them correctly and gently press them into place.
TIP: If you do accidentally rub the carbon off of the pads or if you have badly damaged pads and need them to work in a pinch, you can try using a conductive ink pen to restore the pads. These pens contain a metallic ink that can be used to draw a thin layer of conductive material onto the pads. Simply follow the instructions on the pen to apply the ink and allow it to dry before reassembling the controller.
By being careful and handling the membranes gently, you can ensure that your controller is in top working order and avoid any issues with unresponsive buttons.
Also, when you were taking the controller apart, perhaps you noticed this:

How does an NES Controller Work, Anyway?
One key component of the NES controller is the shift register (NEC D4021BC), which is responsible for receiving input from the buttons and transmitting it to the console. The shift register is a type of digital logic circuit that can store and transmit data in a serial or parallel fashion. In the NES controller, the shift register operates in parallel-in, serial-out mode, which means that it can receive input from multiple sources (the buttons) simultaneously and transmit the data in a serial format.
The buttons on the NES controller are connected to the shift register via a series of diodes, which serve as voltage-controlled switches. When a button is pressed, the pressure causes those rubber membranes, as mentioned above, to make contact with a carbon pad, which is connected to a contact trace on the circuit board. This contact trace carries an electrical current, which is transmitted to the shift register via the diode. The shift register then, well…registers the input and prepares it for transmission to the console.
The shift register is connected to the console via the cord, which is used to transmit the data from the controller to the console. The console processes the data and translates it into action in the game.
Here are a few fun facts about the NES controller:
The NES controller was designed by Gunpei Yokoi, the same person who designed the Game Boy. The controller's simple, rectangular shape was intended to be easy to hold and use, and it has become a recognizable symbol of the NES console.
The NES controller was one of the first to feature a D-pad, or "directional pad," which allowed players to move their characters up, down, left, and right. This replaced the traditional joystick and has become a standard feature on most modern controllers.
The NES controller also featured four face buttons: A, B, Select, and Start. These buttons allowed players to perform different actions within the game and access menus.
The NES controller was known for its durability and reliability. Many players have reported using the same controller for years without any issues, and it has even become a common sight at retro gaming events and tournaments.
The NES controller has inspired numerous imitators and has even been referenced in popular culture. It has been referenced in movies, TV shows, and music, and has become a symbol of the retro gaming movement.


